Category: Equipment / Decoration Page 1 of 2

Construction reports for Weissensteinstrasse 16

Güterstrasse has been handed over, long live Weissensteinstrasse! We have reached the end of our renovation phase – which is just as well, because our energy is slowly running out. There are still lots of little things to do, but we are no longer on site every day and the rooms are ready for use!

We would like to take this opportunity to once again express our heartfelt thanks to all our helpers and donors. Without you, this would not have been possible. We are excited to hear what you think of the rooms.

Construction report I from 9/29

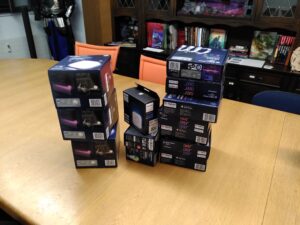
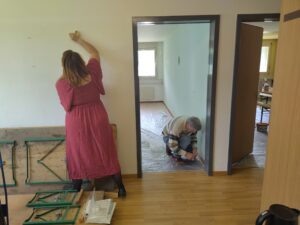
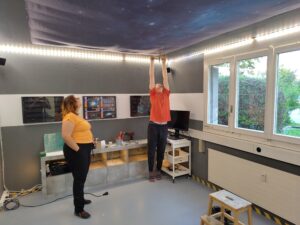
Work has begun on our new premises at Weissensteinstrasse 16. Early in the morning, we installed the new doorbells – and shed some blood for the first time in the process. So the renovation is well underway:

  • Blood
  • Sweat
  • Tears (sure to come)

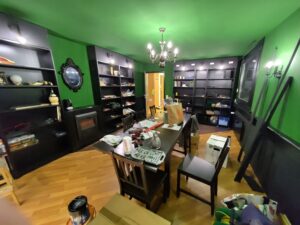
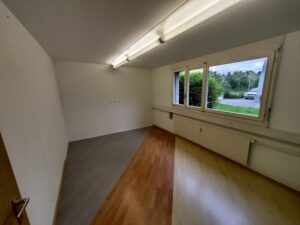
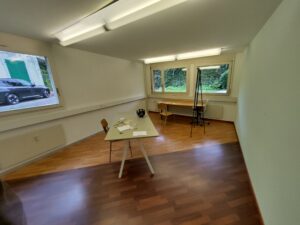
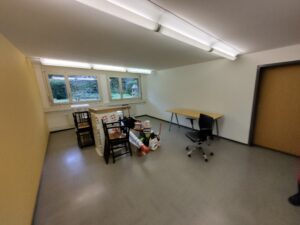
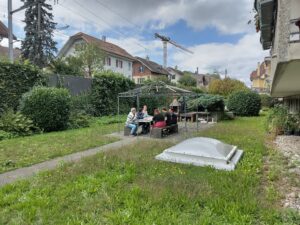
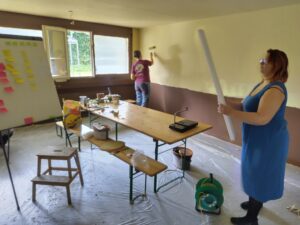
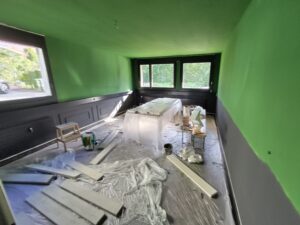
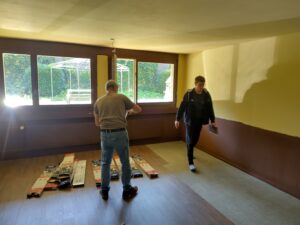
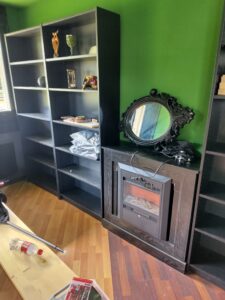
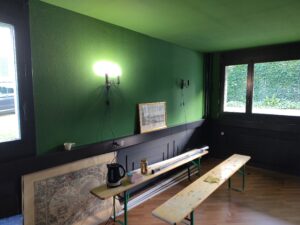
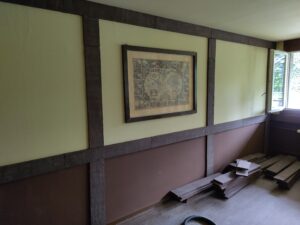
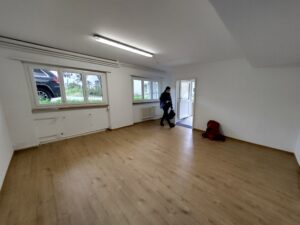
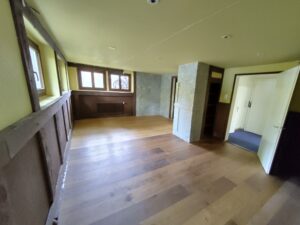
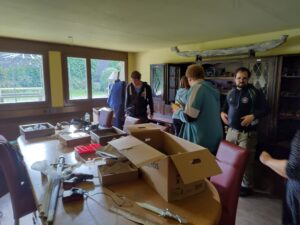
Below are some pictures showing what the rooms looked like before. We spent the morning removing the lamps from the ceiling, taking materials to the basement, filling holes in the walls, and covering the rooms properly. For lunch, we enjoyed the new garden (yes, you could also play there, to all those who wanted “Forrest” as a theme), including food delivery. After that, we continued painting the tavern and the library.

Construction report II from September 30 to October 1

There was no construction report yesterday because almost all of the helpers had a session in the old (!) room in the evening. But now you can admire our concentrated progress.

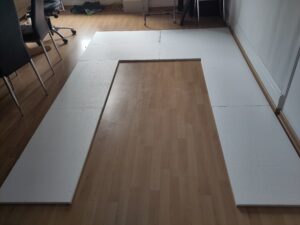
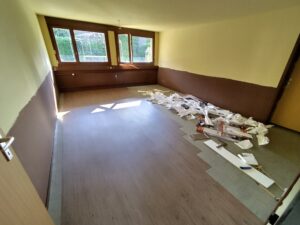
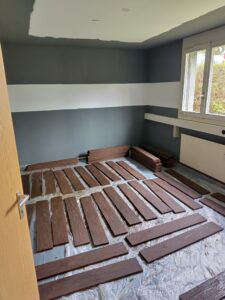
Tavern: In addition to the second coat of paint on the walls, the window and door frames have now also been painted brown. Because we are well on schedule, we have also carried all the building materials into and out of the room several times. An important step! Finally, after long discussions about sloping walls (déjà vu from the old room), we were able to start on the new floor today.

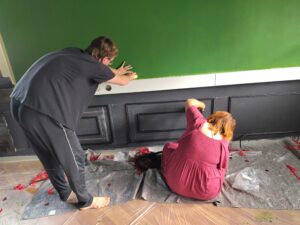
Library: The library also received a second coat of paint and a general “repainting.” The first decorative elements were even installed, which was a first test for Patricia’s nerves! Thanks to our helpers, we are well on schedule and were able to start producing the boards.

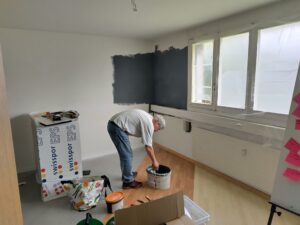
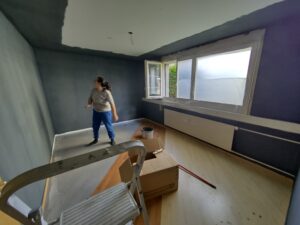
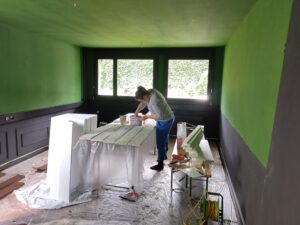
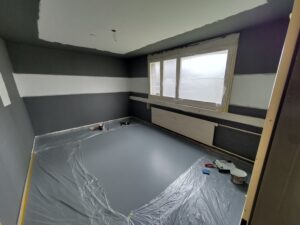
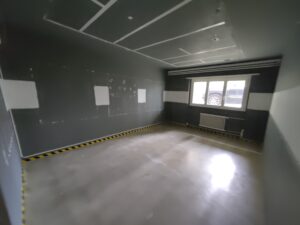
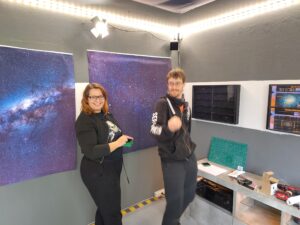
Sci-Fi/Bridge: The day before yesterday it was still a storage room, and now it’s completely painted. So if you’ve always wanted to stand in a completely gray void, here’s your chance. And simply because it doesn’t fit anywhere else: Today we tried the Huayuan restaurant next door for the first time, which has a lunch buffet for CHF 19.50

Construction report III from October 2–3

No construction report on Thursday because we all went to KuL Social. We don’t spend enough free time at the club

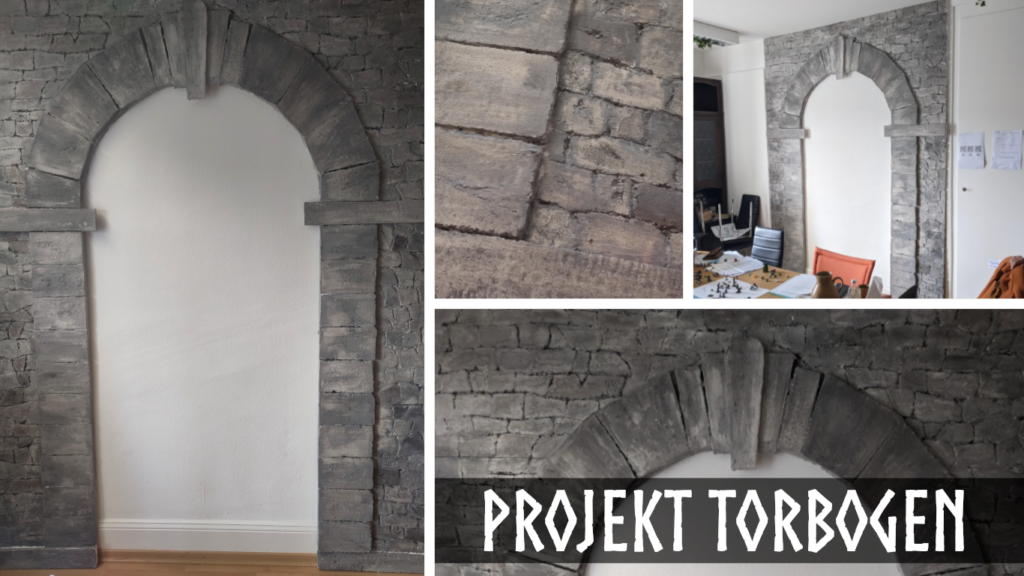
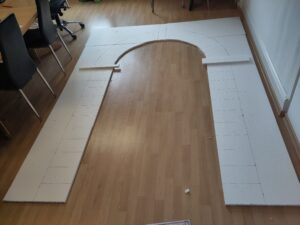
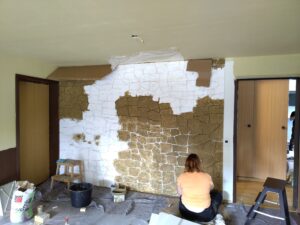
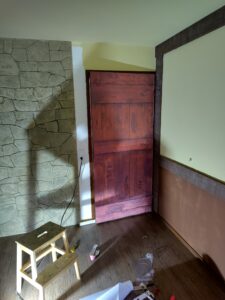
Tavern: The floor is now almost finished and the room has been prepared so that we can start building the stone wall. As mentioned in the first report, this mainly involved carrying things in and out. But the floor looks really great—my cell phone camera doesn’t do it justice!

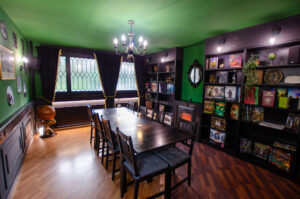
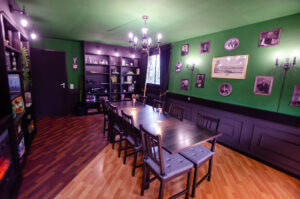
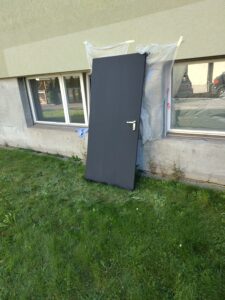
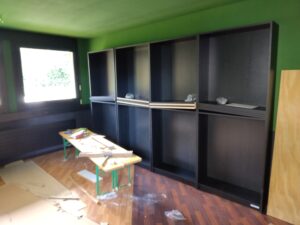
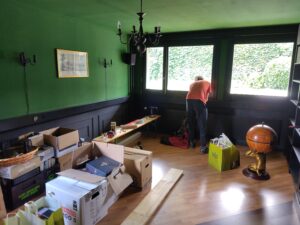
Library: All that was left to do here was to make some repairs and paint the door black. It hasn’t been put back in place yet because we can’t find the pins. Otherwise, the library has served, quite atypically, primarily as a workshop for real work. But honestly, the wooden floor and the black and green walls look cool, don’t they?

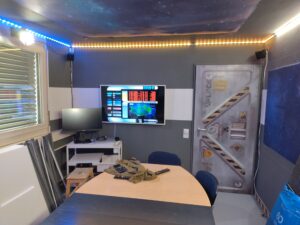
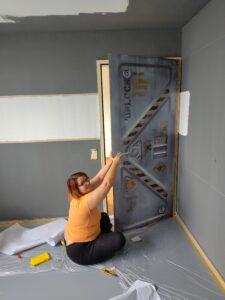
Bridge: The sci-fi room now looks a bit more interesting again with the white stripe. It also got a high-security door so that my players can’t run away anymore.

Construction report IV from October 6–7

HeroFest took place on Saturday, and we took a break on Sunday. But then we got right back to it on Monday and Tuesday—though without me, since I had to work in “real life.” That’s why there aren’t that many pictures.

In the tavern, the wall was installed to create a small side room. We ALMOST made the mistake of forgetting the keys to the side room behind the wall. So much for GMs having everything under control… Patricia immediately started installing a stone wall so that no one would know about our secret room!

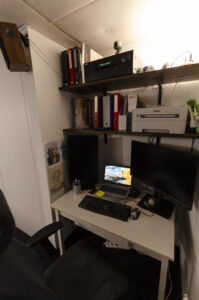
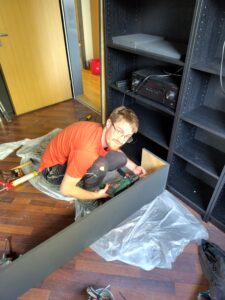
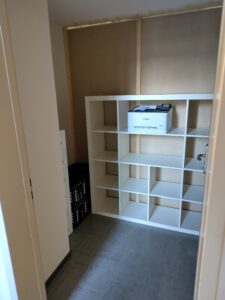
The shelves were set up in the library – without decorations and ceiling connections, of course, but you can still get an idea of what it will look like. Meanwhile, my father is busy working on the electronics so that we can hide the cables properly.

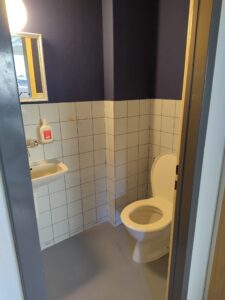
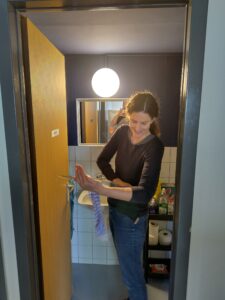
And did I mention our toilet? Compared to the old room, it looks really great! It is therefore also suitable for sessions.

Construction report V from October 8–10

Slowly but surely, we have reached the smaller tasks. This is a depressing phase because you can easily spend eight hours in the room without it looking much different! Nevertheless, quite a lot has actually happened. Work continued on the furniture in the library, the first lamps were installed, plans were made, and the first curiosities found their way onto the bookshelves.

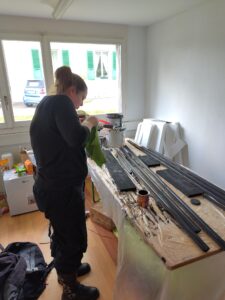
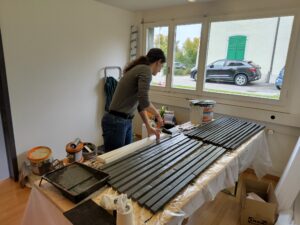
The final painting work was done on the bridge, and of course, various helpers spent hours working on the wood for the tavern. It will be finished at some point, I promise! Our swing-out screen is now installed in the room itself. It’s ideal for showing backgrounds, having battle maps on the wall, or… I don’t know, I haven’t thought about it that much.

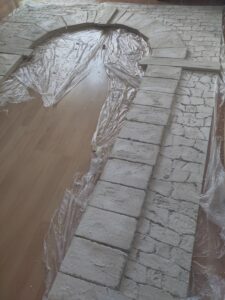
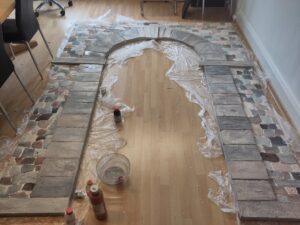
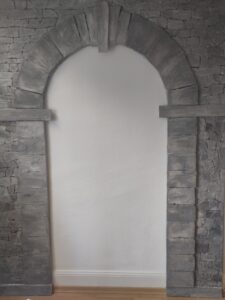
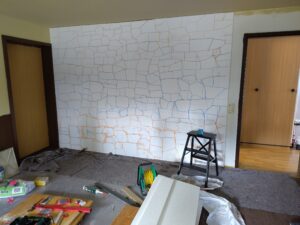
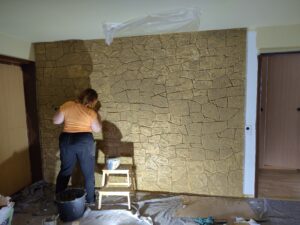
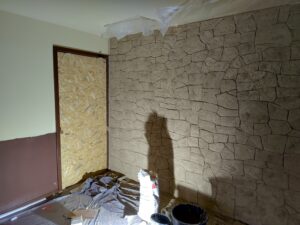
And in the tavern, we (especially Patricia) spent what felt like eons working on the new stone wall. Last but not least: corrections were made in the bathroom, and the mirror is now centered and no longer offset to the left. Hallelujah! Thanks again to all the helpers!

Construction report VI from October 11–13

We took it a little easier over the weekend – spending only 90% of our time thinking about KuL. But now, FINALLY, all the woodwork is finished. Cut, painted, washed, and brushed. Today we also started installing the tavern wall, which looks great (sorry Tim and Patricia, I didn’t take any other pictures).

The stone wall got a second coat of stone paint, and the door to the adjacent massage studio was insulated so well that the wall around it is now the weak point. The chandelier is now hanging in the library, and the covers for the shelves are in the works.

Construction report VII from October 14–16

A lot of progress has been made over the last few days. Unfortunately, due to work commitments, I was only able to join in the evenings and therefore couldn’t take many photos of the many helpers and work steps. But I was able to show up every evening like a real construction manager, make comments, and go home

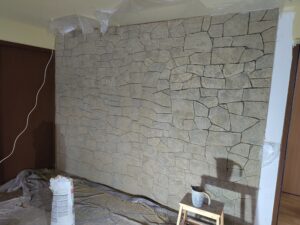
Let’s start in the tavern with a proper picture of the wooden wall and one of the stone wall, where all the work steps have now been completed. The secret door next to it is also nicely covered. What does it actually look like behind the stone wall? That’s where our secret storage room and storage space for GMs is located. That’s why it looks so desolate.

The library is currently being used as a storage area, but a lot has happened here too – behind the scenes. Speakers and cables have been installed, moldings have been painted, the first games have been put away, and curtain rods have been screwed on. Tragically, nothing has ever been read.

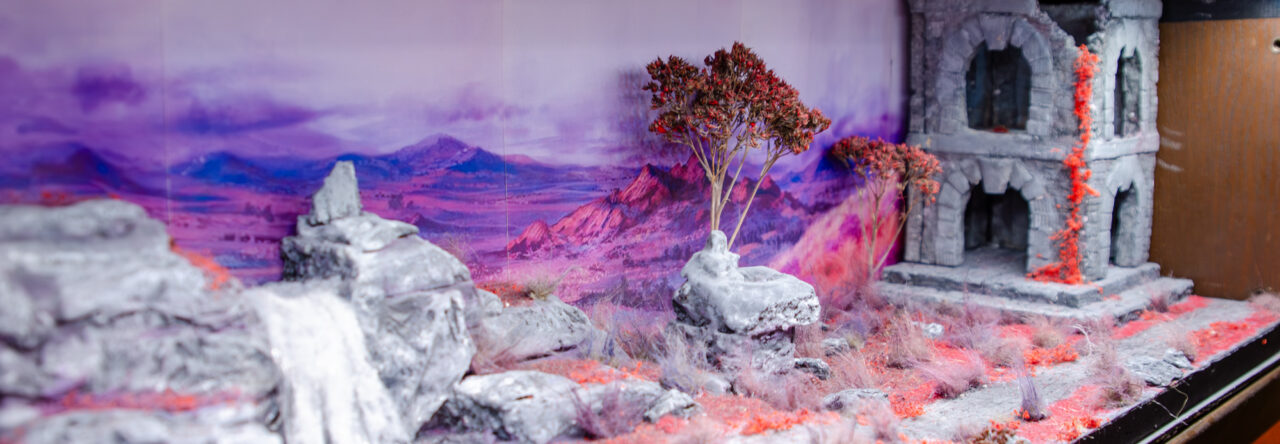
Since we have already dismantled the bridge (bridge just sounds better), things are already looking well advanced here! The light strips were installed by shouting at them until they didn’t dare to leave. The speakers are installed and all the cables are laid. Even the display cases and the sky are already hanging there!

Construction Report VIII from October 17–18

Today was the big moving day, which is why I would like to ping @everyone here. The rooms will now be closed for about a week until we have everything set up. Next Saturday, a new chapter of KuL will begin with the first session! A big thank you to all the helpers from today, but also from the last few weeks. In particular, @Luthiena | Patricia, who planned everything and was on site every day, as well as @Bibl/Tim, who also spent countless hours on the renovation and, on top of that, took care of room bookings, finances, etc.!

First, here are a few farewell pictures of the now-gutted old rooms. But now on to the much cooler new premises, of course! We spent yesterday tidying up and finishing the last few tasks: more decorations and additional lights in the sci-fi room, great door decals in the tavern, and working sound systems in the library.

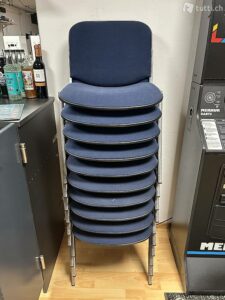
During today’s move, we managed to transport all the furniture to the new rooms in record time. The Bermuda Triangle struck again! You can basically put anything outside and write “free” on it, and it’ll be gone. The coat rack, several shelves, and all the wooden chairs (have fun, new owners, haha) – all gone within a few hours. And of course, we were also able to set up quite a bit in the room. But that’s rather incidental.

Construction report IX from October 19–20

This is the last construction report. The simple reason for this is that there are now lots of little details and technical things to do that are not so noticeable in the photos. The following photos are therefore simply intended to give you an impression. So you can estimate what it will look like in a few days when everything is finally finished:

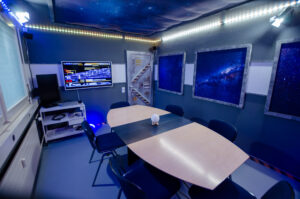
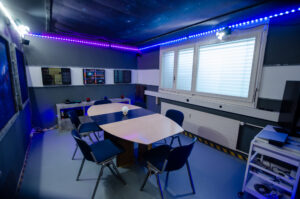
  • The sci-fi bridge now has frames around the windows and atmospheric images on the TV.
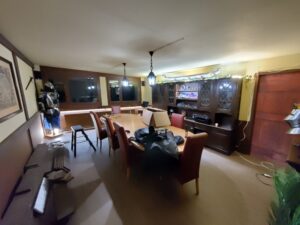
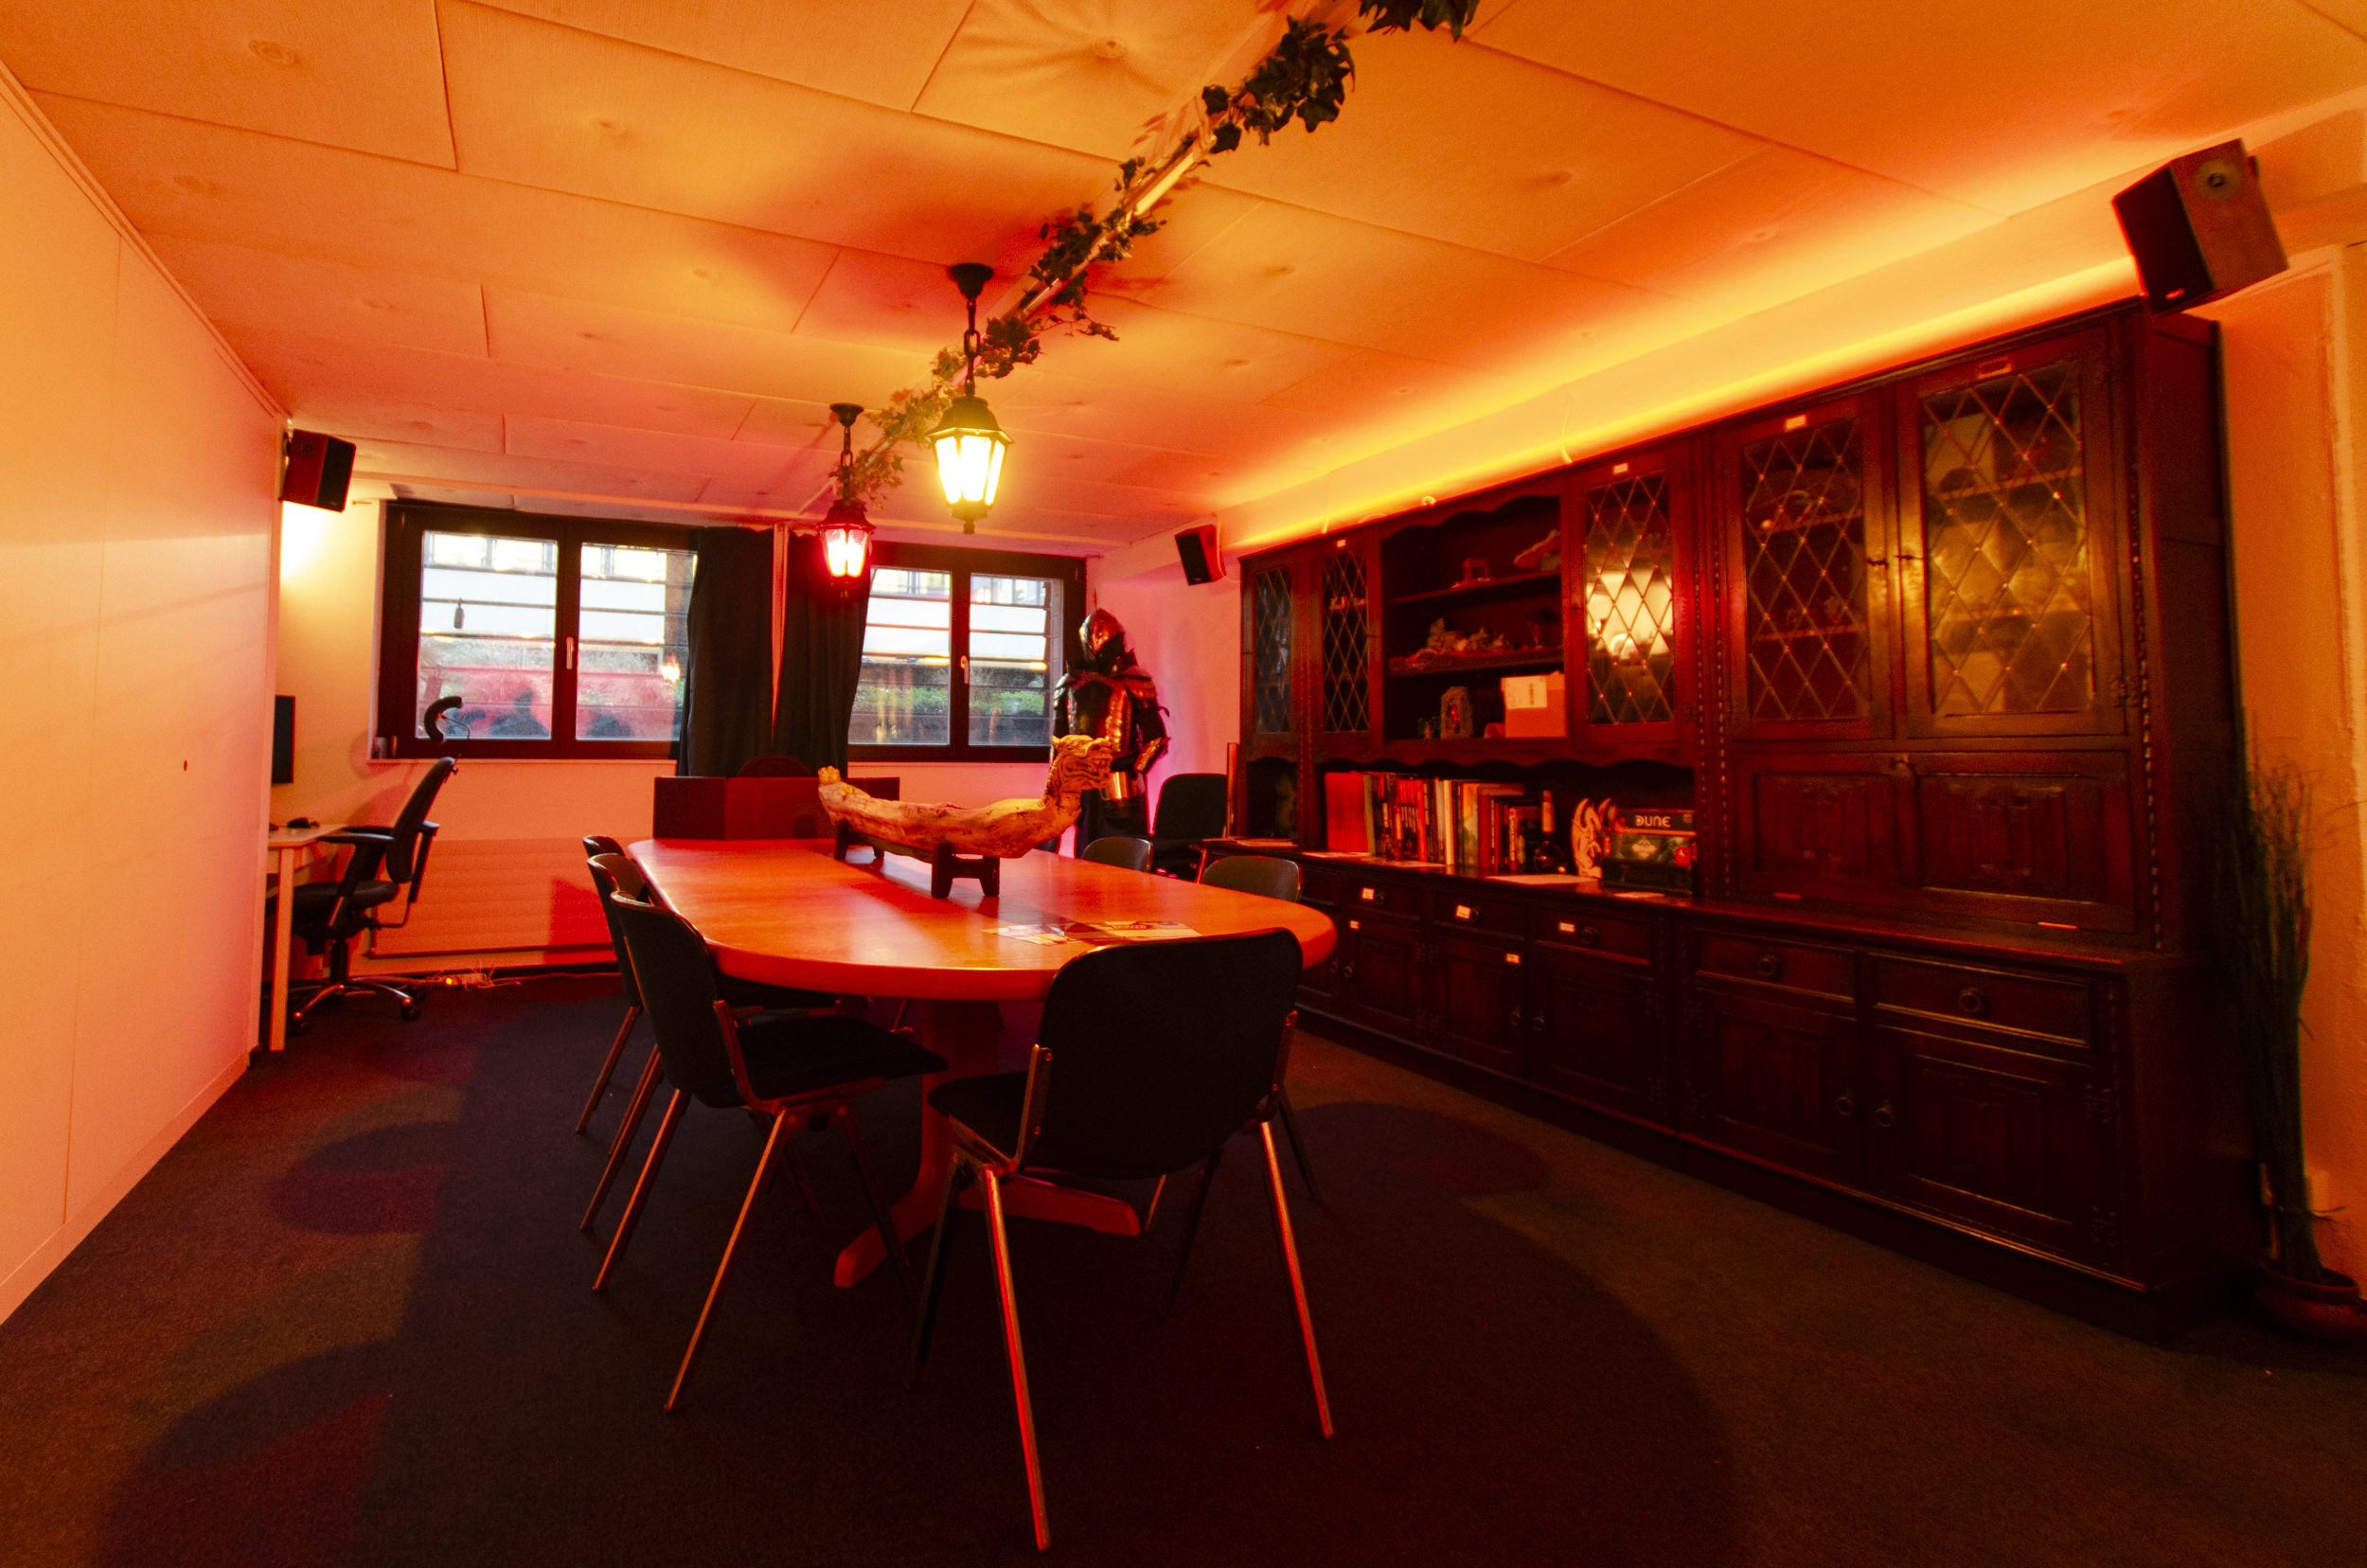
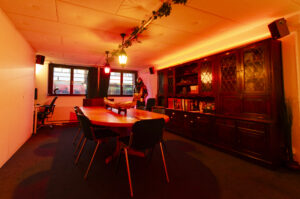
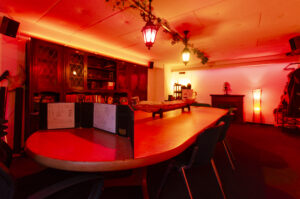
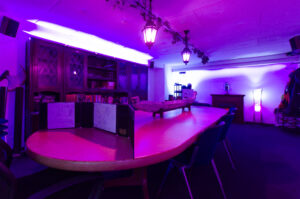
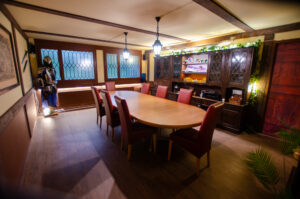
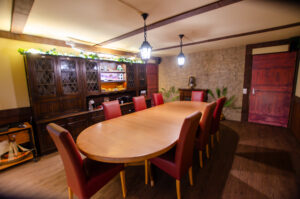
  • The fantasy tavern now has the lighting and sound installed and most of the decorations in place.
  • The dark academia library now also has all its lighting in place.
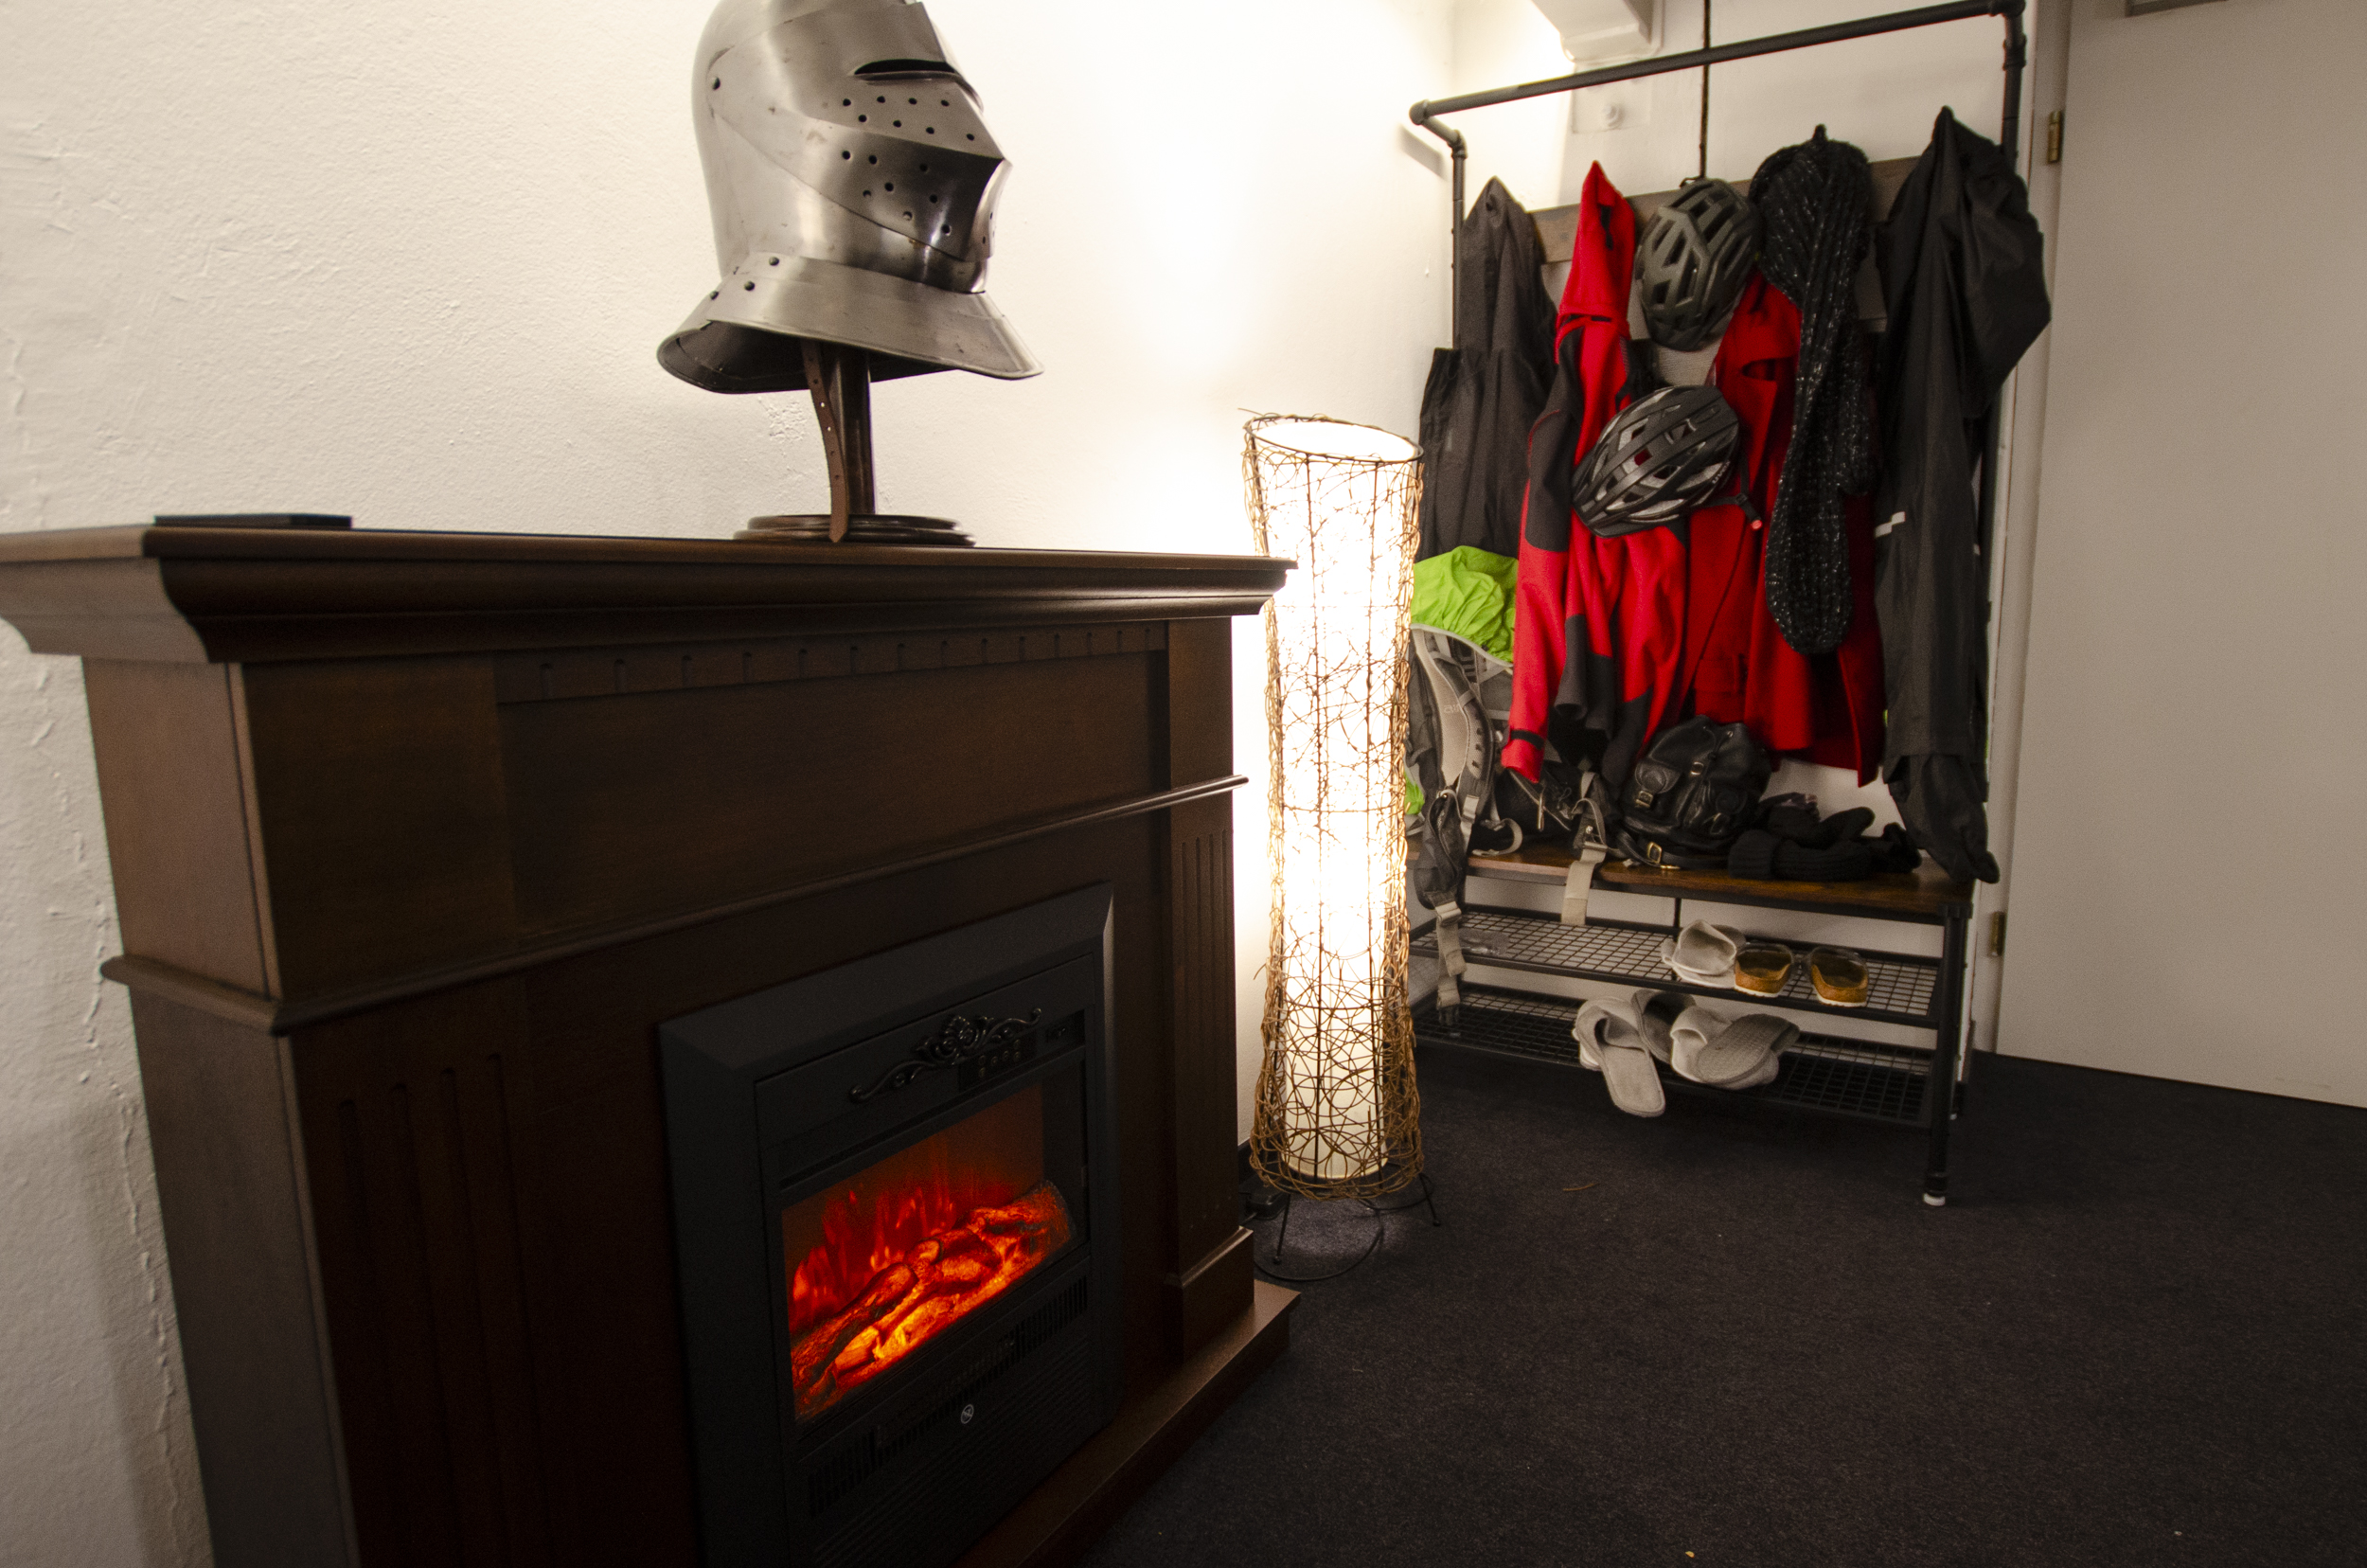
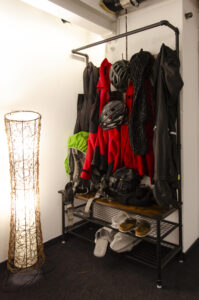
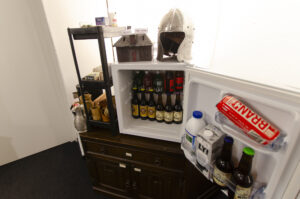
  • And the entrance area is still very untidy – but now it’s untidy WITH furniture.

For us, these are also completely new rooms with different dimensions, and in the case of the library, even with completely new decor. We will therefore be gathering feedback after the first few sessions and would be happy to hear your thoughts as well. Please be kind and constructive – a lot of sweat and blood has gone into these rooms.

Room upgrades

With our move to CDC‘s new premises at Laupenstrasse 18, our entire budget is no longer used for rent. Instead, we can finally take care of things like sound, lighting and, of course, decoration.

Sounding sounds

The main aim of the new loudspeakers was to achieve a better surround solution. Effects and ambient music in particular, such as in Syrinscape, simply sound more convincing when they come from all around instead of just from behind. And of course we also wanted to improve the overall quality. We therefore opted for two pairs of Magnat Monitor S10 D in walnut.

  • As dipole speakers, they develop a very large stage (i.e. they sound more omnipresent)
  • Size and appearance fit well in the room
  • Quite affordable (CHF 128.- per pair)

Of course, these speakers have to be connected somewhere. The Onkyo TXSR393DAB receiver is used for this purpose. A device like this is simply necessary to operate passive speakers (without their own power connection). However, it offers everything we need:

  • Connections for the speakers with a possible extension for a subwoofer
  • Bluetooth, jack and HDMI (possibly for projector)
  • Reasonable price on offer (CHF 269.-)

We also made a few small purchases, such as speaker cables and brackets (Vogels VLB 500). Unfortunately, the latter were only half compatible with the speakers, but we eventually found a solution.

All in all, this brings us to a total cost of CHF 582.80. Would you like to join this working group in the future? Then click here for the Discord

Lightning lights

Until now, the room was lit by neon tubes. Practical? Yes. Beautiful? No. So a new solution was needed that would fit better into the room visually and could also be adjusted in terms of color.

Die gekauften Licht-Produkte

We opted for Livarno, the smart home system from Lidl. As a Zigbee system, it is compatible with most other systems such as Philips Hue etc. – but is much cheaper. Everything is controlled via a Philips Hue Bridge or a Samsung Galaxy Tab A8 as a tablet (the sound can also be streamed via the tablet). We made specific purchases:

  • 4x light strip (but received 7 pieces!) for the living wall and the steel beam
  • 4x light bulb for the lanterns above the table and the floor lamp
  • 3x mood lights for the areas behind the armor, battle station and refrigerator

This means that various lighting scenes can now be set and saved on the tablet. We will prepare some, but of course all GMs are free to create their own! The only problem: animations don’t really want to work. We are still working on this and are optimistic that we will be able to make this possible via apps from other manufacturers.

The costs for the lighting concept amount to CHF 406.45, which of course also includes the tablet. Would you like to join this working group in the future? Then click here for the Discord

Fitting decorations

Last but not least, the furnishings in the room will also receive some improvements. Since we had to leave our beautiful archway behind due to its size, we needed a new centerpiece. An electric fireplace is to take over this important position. We opted for the Voltomat HEATING – almost exclusively because of its looks =)

Unsere neuen Stühle

But we also needed curtains so that people couldn’t look directly into our room, a wardrobe as there was nothing in the corridor in the new room, a coffee machine, which was no longer needed due to the lack of a kitchen, and all sorts of bits and bobs such as cutlery, extension leads, foam seals for the door… To make sure that everything had enough space, we installed a DIY wall shelf above the battlestation. Last but not least, there was also a set of new stackable chairs to better match the furnishings.

There are still a few things planned: lead glass film for the windows, a screen for the projector, a stone wall around the fireplace, a hanger to display the flyers, possibly acoustic panels for the door and, of course, the self-made table! However, all expenses must now be recouped and no major purchases will be made for the next 6-9 months. If this is too long for you, you can make a donation at any time 😉 Want to join this working group in the future? Then here to the Discord

Conclusion

We are very happy with the development of the room and hope that you feel the same way. If you would like to rent the room now, you can do so here. We are very happy to receive feedback!

We would like to thank our helpers in setting up the room: Sybille, Tim, Patricia, Chrigi, Alvin and Mario.

KuL-Room updates!

It’s been quite a while since we reported what’s going on in the room. Of course, we always tell it at the KuL Höck, but not all of them are there – and not every change deserves its own post, like the fantastic archway! So here is a non-exhaustive list:

A new diorama presents the Minis. A detailed craft report will follow.

A tailor’s dummy including armor now decorates the room at the head end – the armor is still being completed.

The wall right next to the entrance was too empty. A picture now decorates this area. If someone wants to make something nicer here, that is of course no problem!

The refrigerator is now tidy and the drinks are better visible.

  • Permanently installed laptop with general account, which you can use when leading! Is automatically connected to both screens and the sound system.
  • More power strips for free use
  • More terrain parts
  • New minis (various monsters and heroes)
  • Fan for the hot days
  • New books and games
  • New lamps are installed
  • The snacks drawer is always well stocked (almost too well!)
  • New manuals are distributed in the room

… and much more!

Want to support projects like these and more? Then donate now for the room or a specific project. Of course you can also become a member and benefit from some advantages 😉

The archway stands!

The catacomb part in “Catacombs & Lindworms” is (almost) finished! In the last few days a huge decorative element for the KuL room has been created from styrofoam, plaster, paint and a lot of patience, with the goal in mind to provide more fantasy ambience.

On Saturday, Tim, Mario and Patricia finally attached the archway to the wall. It is not quite finished yet, as there are still a few small corrections and finishing touches to be made, but we wanted to show you how it looks in the room!

The archway is meant as a frame for a kind of interactive art gallery:

Here, all your beautifully crafted characters, monsters, maps, etc. can be presented in style, instead of living a shadowy existence in a dark closet!

Patricia shows you in a short step-by-step how the fake stone archway has been created:

Materials for fake stone archway

  • 11 insulation boards made of styrofoam (FPS 15, 100cm x 50cm x 2cm)
  • felt-tip pen
  • cutter / carpet knife
  • 2kg plaster
  • white glue
  • toothpick
  • acrylic paints (black, white, terracotta, green)
  • brush
  • water
  • tarpaulin or newspapers
  • adhesive tape
  • string
  • dried moss

Day 1: Basic structure

Styroporplatten auf Boden auslegen

First, lay out the polystyrene sheets on the floor and cut them to the size of the wall.

Styroporplatten in Bogenform zugeschnitten

Draw the arc and cut it out with a cutter.

Dekorelemente des Bogens aufzeichnen

Now sketch out the basic shape of the arch and the decorative elements. (My design has changed several times during the project).

Dekorsteine für Torbogen ausschneiden und platzieren

Cut out the individual decorative stones from the remaining styrofoam sheets and place them. The upper part of the arch was a real challenge, so I adjusted the design again and cut the stones straight instead of curved.

Small imperfections can be corrected later with the plaster.

Steinmauerstrukturen in Styropor schnitzen

Now paint on the approximate shape of the stone wall with a felt-tip pen and roughly trace it with the cutter. The porous nature of the styrofoam automatically creates an irregular, natural pattern.

To give the styrofoam surface even more stone texture, I scratched and scored it with the cutter, worked on it with my fists and walked around on it – This creates a surprisingly realistic relief!

Day 2: Plaster

Styropor-Torbogen eingipsen

In a next step, I glued all the decorative stones with white glue and then painted the whole thing with plaster.

Now it looks like real stone!

In retrospect, I would approach the whole thing a little differently: I would plaster and paint the individual decorative stones first and then prime the surface with black paint before gluing them on.

Learn from my mistakes!

Day 3: Color

Torbogen mit Acrylfarben grundieren

Now color comes into play!

With the colors white, black and terracotta in different mixing ratios, the individual stones are painted. This might look a bit nervous at first, but it will come together nicely with the next step – This process ensures natural color nuances in the end!

Torbogen mit Wash einpinseln

Now apply a dark wash to the sheet. This is a very fluid, transparent color that flows into all the cracks and gaps and gives the whole thing more depth. In addition, the variegated colors are evenly tinted and a uniform, harmonious color scheme with many natural nuances is created – just like a real stone wall!

Finally, all elevations and ridges are emphasized with a light brush, which brings even more detail and texture to the overall effect.

Day 4: Finish

Fertigen Torbogen aufrichten

And here is the final result!

The arch was attached to the wall with tape and adhesive strips. Since the arch spans from the floor to the ceiling, it carries its own weight (Styrofoam is amazingly stable!).
The tape strips are just to keep the whole thing from tipping forward.

When mounting it to the wall, a few small things broke and had to be adjusted (Unfortunately, the arch was a little too high to begin with).

To finish the archway, the next step will be to add moss and some artificial staining to make the whole thing a bit more realistic…

I hope you like the fake stone archway! The construction was a lot of fun, even though it took much longer than expected….

The Frostsummoner has been summoned!

Aka. we have a fridge… -cabinet full of delicious cold drinks! Thanks to the contributor of our first crowdfunding project, we now have the following bubbly options:

  • four varieties of ChariTea sodas
  • Lola Bier – non-alcoholic IPA
  • five types of sparkling Gazosa
  • Pluto Solibier – amber ale
  • coming soon: Hügubier from the Emmental
With a share-snack drawer and convenient storage space directly underneath
The space is a bit limited, please refill 😉

A comment on the product range:

We have started with a beverage selection for now. This selection is flexible, and you are welcome to make suggestions. However, we cannot include too many different drinks because we lack the space to store them all.

We are still deciding which type of mate we should offer and need to try out a few options! If you have any further suggestions, please let us know in the comments!

Page 1 of 2

Katakomben & Lindwürmer & 2025